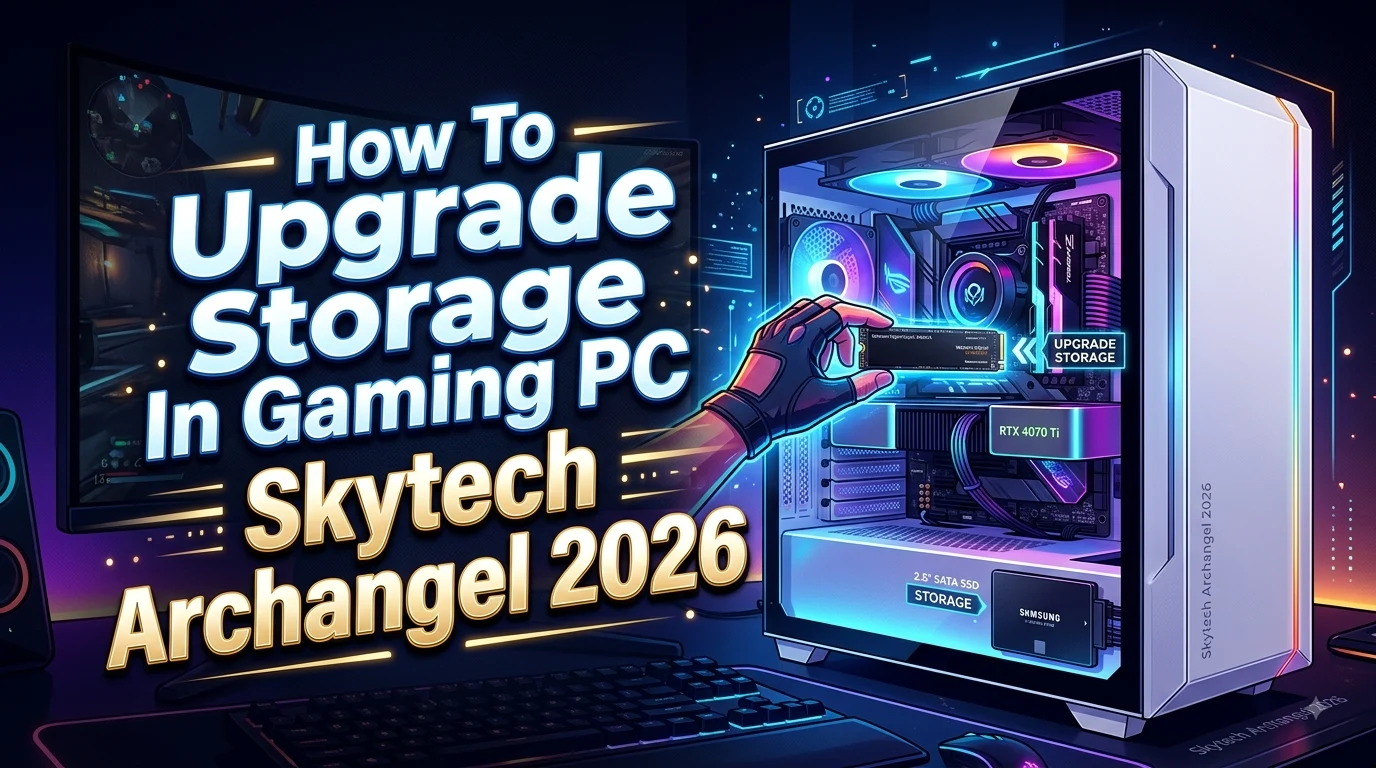
Upgrading the storage in a Skytech Archangel 2026 gaming PC is one of the easiest ways to improve your gaming setup. More storage gives you room for larger games, applications, recordings, screenshots, and personal files without constantly deleting older data. The upgrade can also help you organize your system more efficiently.
The exact storage hardware inside a Skytech Archangel 2026 can vary because Skytech sold different configurations. Your computer may contain a SATA SSD, hard drive, or another storage setup depending on the original configuration. Therefore, the safest approach is to identify your current drive and available connections before buying new hardware. This guide explains how to check your existing storage, choose a compatible upgrade, install a new drive, format it, move games, and avoid common mistakes.
Understanding Skytech Archangel 2026 Storage
The first step in learning how to upgrade storage in a Skytech Archangel 2026 is understanding that not every system has exactly the same internal configuration. Prebuilt gaming computers can be sold with different storage capacities and drive combinations.
Your Archangel 2026 may have been configured with a primary SSD for Windows and applications, while some configurations may also include a larger hard disk for additional files. The exact setup depends on the version you purchased.
Before opening the computer, check Windows to identify your current drives. Open File Explorer, select This PC, and look at the available drives and their capacity. You can also open Disk Management by right-clicking the Start button and selecting Disk Management.
The physical drive type matters because installation methods differ. A 2.5-inch SATA SSD usually connects with a SATA data cable and SATA power connection. A traditional hard drive uses a similar connection. An M.2 SSD, however, installs directly onto a compatible motherboard slot.
Do not assume that your PC supports every type of storage. Check the motherboard and available connections before purchasing an upgrade.
If you are unsure about the exact configuration, checking the model information, original purchase documentation, or motherboard specifications can prevent compatibility problems.
Why Upgrade Storage in a Skytech Archangel 2026?
Storage upgrades can make a major difference for gamers because modern PC games can require a large amount of disk space. A few popular games can consume hundreds of gigabytes, especially when you include downloadable content, high-resolution texture packs, and updates.
When your primary drive becomes nearly full, Windows may also have less room for temporary files, updates, applications, and normal system operations. Keeping reasonable free space available can make general PC maintenance easier.
An additional SSD can be particularly useful if your original system has limited storage. You can keep Windows and important applications on the original drive while installing games and large files on the new drive.
A storage upgrade can also provide organizational benefits. Instead of filling your Windows drive with every game and media file, you can dedicate another drive to your gaming library.
However, storage capacity and storage speed are different things. Adding a larger drive gives you more space, but the speed improvement depends on what drive you currently have and what drive you install.
For many Skytech Archangel 2020 owners, adding a compatible SSD is a practical upgrade because SSDs generally provide faster access times than traditional mechanical hard drives.
Check Your Existing Storage Before Buying
Before purchasing a new drive, identify what is already installed in your Skytech Archangel 2020.
Start by checking Windows. Press Windows + X and select Disk Management. You should see the physical storage devices and their partitions.
You can also open Task Manager, select the Performance tab, and click Disk to see information about your active storage devices. Windows may identify the drive type or provide its model number.
Write down the model number if possible. Searching the model later can help you determine whether the drive is a SATA SSD, hard drive, or another type.
Next, inspect the amount of free space. Open File Explorer and check the capacity of your C: drive and any additional drives.
You should also determine whether your motherboard has an unused M.2 slot. If it does, an M.2 SSD may offer a cleaner installation because the drive attaches directly to the motherboard without separate SATA data cabling.
If you plan to install a 2.5-inch SATA SSD, check whether you have an available SATA port and SATA power connector. Also look for a suitable mounting location inside the case.
This preparation takes only a few minutes and can prevent buying a drive that you cannot install.
Choose the Right Storage Drive
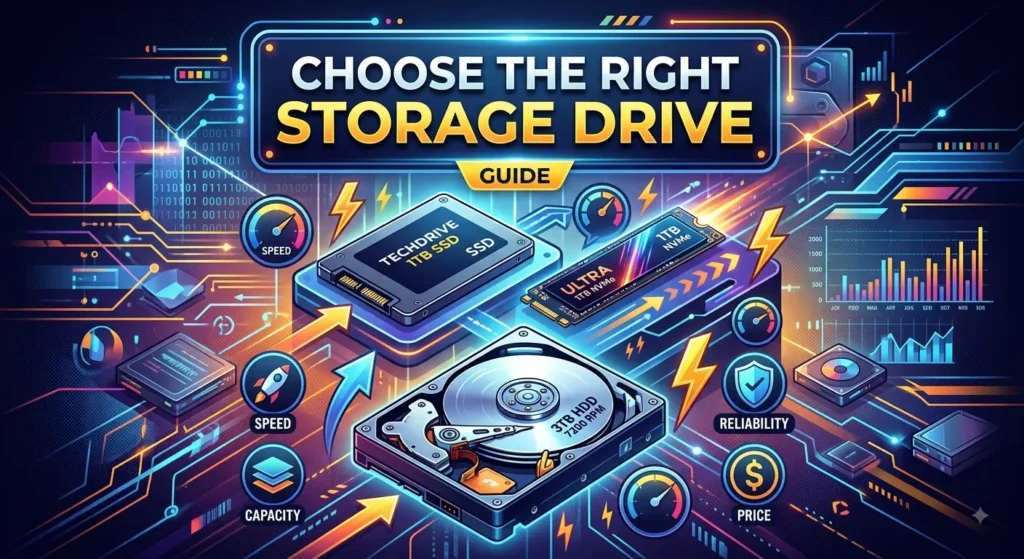
The correct storage drive depends on your Skytech Archangel 2026 configuration and motherboard support.
A 2.5-inch SATA SSD is often a straightforward option when a SATA connection and mounting location are available. SATA SSDs provide significantly faster responsiveness than mechanical hard drives while using a familiar connection standard.
An M.2 SSD can be another excellent choice if your motherboard includes a compatible M.2 slot. However, M.2 describes the physical form factor rather than one specific storage technology. M.2 drives can use different interfaces, so you must verify motherboard compatibility.
A 3.5-inch hard drive can make sense when maximum capacity matters more than speed. Hard drives generally offer large capacities at relatively low prices, making them useful for archived games, recordings, photos, and other files.
For a gaming-focused upgrade, an SSD is usually the more attractive choice when your budget allows it. Faster storage can reduce loading times compared with a traditional hard disk.
Capacity should match your needs. A smaller drive may work for a handful of games, while a larger drive makes more sense if you maintain a large Steam, Epic Games, or other game library.
Always confirm compatibility before ordering.
Check Whether Your PC Supports an M.2 SSD
M.2 storage can provide a convenient installation because the drive usually mounts directly onto the motherboard. However, you should not purchase an M.2 SSD solely because it is physically small.
First, inspect the motherboard for an M.2 slot. The slot typically looks like a small horizontal connector with a screw mounting point farther along the board.
Next, check the motherboard documentation or specifications to determine which M.2 storage types it supports. Some slots support NVMe PCIe drives, while others may support SATA-based M.2 drives.
This distinction matters. An M.2 NVMe SSD will not automatically work in every M.2 slot.
You should also check whether an existing M.2 drive is already installed. If the slot is occupied, you may need to use a different storage interface or replace the existing drive.
If you cannot identify the motherboard model, use Windows System Information or a hardware-information utility to find it. The motherboard model can then help you locate the correct specifications.
Do not force an M.2 drive into a slot. The connector is designed to fit in a particular orientation, and forcing it can damage the drive or motherboard.
When compatibility is confirmed, M.2 installation can be one of the cleanest ways to expand storage in a gaming PC.
How to Prepare Before Opening the PC
Proper preparation makes a storage upgrade safer and easier.
First, shut down Windows completely. Do not begin working inside the computer while it is running or sleeping.
Turn off the power supply if your system has a rear power switch, then unplug the power cable from the wall or power strip.
Press the PC’s power button for a few seconds after unplugging it. This can help discharge remaining electrical power from the system.
Move the computer to a clean, stable workspace with good lighting. Avoid working on carpet if possible because static electricity can be a concern when handling internal components.
Before touching hardware, ground yourself appropriately. You can use an anti-static wrist strap or follow safe anti-static handling practices.
Keep screws and small components in a safe place. Taking photos before disconnecting cables can also help you remember how everything was positioned.
Do not touch the gold contacts on an SSD or other expansion component.
If you are installing a SATA drive, make sure you have the required SATA data cable and an available SATA power connector. Some retail SSDs do not include every cable required for installation.
Preparation is especially important with a prebuilt PC because cable routing can be tight. Taking your time is safer than pulling or forcing components.
How to Install a 2.5-Inch SATA SSD
A 2.5-inch SATA SSD is often straightforward to install if your Skytech Archangel 2020 has an available SATA connection.
Begin by opening the case according to its panel design. Locate an available 2.5-inch mounting area or compatible drive bracket.
Secure the SSD using the appropriate screws. Do not overtighten them.
Next, connect one end of the SATA data cable to the SSD. Connect the other end to an available SATA port on the motherboard.
Then connect a SATA power cable from the power supply to the SSD. The SATA power connector is wider than the SATA data connector, so the two should not be confused.
Check both connections carefully. They should fit firmly without excessive force.
Before closing the case, make sure the cables are not interfering with fans or other moving components.
Reconnect the PC’s power cable and start the computer.
If Windows loads normally, open Disk Management. The new SSD may appear as unallocated space rather than a usable drive.
You will need to initialize and format the drive before Windows can normally use it for file storage.
If the SSD does not appear, shut down the computer and check the SATA data and power connections. You can also try another motherboard SATA port if one is available.
How to Install an M.2 SSD
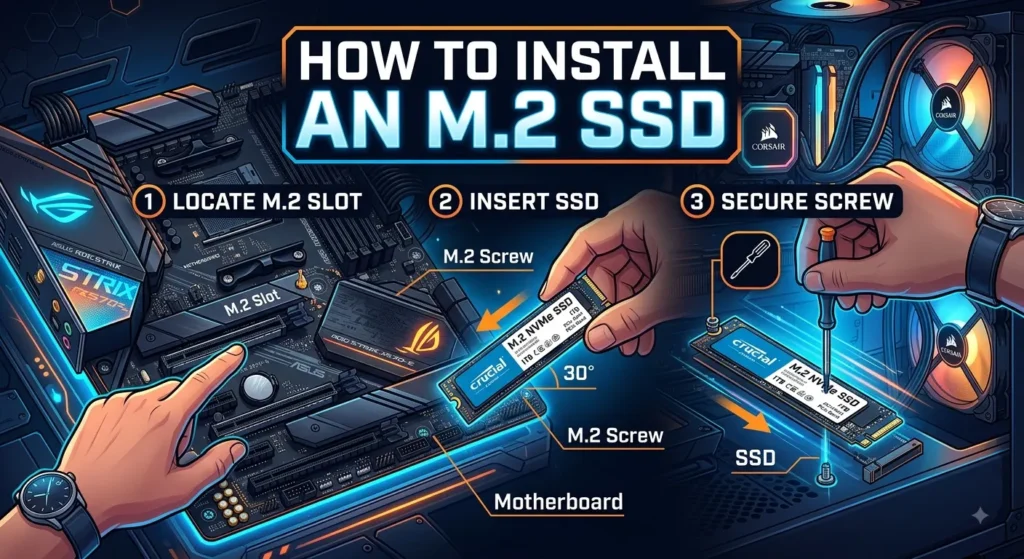
If your Skytech Archangel 2020 motherboard supports a compatible M.2 SSD, installation can be very simple.
Turn off the computer, disconnect the power cable, and open the case.
Locate the M.2 slot on the motherboard. Remove the small retaining screw if one is already installed.
Hold the SSD by its edges. Avoid touching the exposed contacts.
Insert the drive into the M.2 connector at a slight angle. The notch on the drive must line up with the key inside the connector.
Once the drive is fully inserted, gently lower it toward the motherboard.
Secure the end of the SSD with the small M.2 screw. Do not overtighten it.
An M.2 NVMe SSD normally does not require a separate SATA data cable or SATA power cable because it receives power through the motherboard connection.
After installation, reconnect the PC and start Windows.
Open Disk Management and check whether the new drive is detected.
If the drive does not appear, do not assume it is defective. Verify that the motherboard supports the specific M.2 interface used by the SSD and check whether the drive is enabled or recognized in the BIOS or UEFI.
How to Initialize and Format the New Drive
Installing a storage drive physically is only part of the process. Windows needs to recognize and prepare the drive before you can store games on it.
Right-click the Start button and open Disk Management.
Find the newly installed drive. Be careful to identify it correctly because formatting the wrong disk can permanently erase existing data.
A new drive may appear as unallocated space. Windows may also ask you to initialize the disk.
For modern Windows systems, GPT is generally the appropriate partition style for a new storage drive. After initialization, right-click the unallocated area and select the option to create a New Simple Volume.
Follow the wizard. Choose the desired volume size, assign a drive letter, and select a file system such as NTFS for normal Windows gaming storage.
You can give the drive a recognizable name such as Games, Game SSD, or Storage.
Once formatting finishes, open File Explorer. The new drive should appear under This PC.
You can now use the drive for games, applications, recordings, or personal files.
Take your time during this process. The most important safety rule is to verify the correct disk before formatting or deleting partitions.
If the new drive contains important existing data, do not format it until you understand what is stored on it.
How to Move PC Games to the New Drive
After installing a larger storage drive, the next step is moving games so that your original drive has more free space.
Many game launchers provide built-in options for moving installed games. Steam, for example, allows users to create additional library folders on other drives and move supported installed games between library locations.
In Steam, open the storage management area and add the new drive as a library location. You can then select an installed game and use the move option when available.
Other launchers may use different procedures. Epic Games, Xbox, EA, and other platforms have their own storage-management systems.
Avoid manually dragging an installed game folder to another drive unless the launcher specifically supports that method. The launcher may lose track of the installation.
Moving games rather than reinstalling them can save considerable time and internet bandwidth.
You can also set the new drive as the default installation location for future games.
If you have a smaller Windows SSD and a larger gaming SSD, keeping Windows and essential programs on the original drive while placing large game libraries on the new drive can create a practical arrangement.
Remember that moving a game does not necessarily move every related file. Save data and configuration files can sometimes remain in Windows user folders or cloud storage.
Check each launcher for its recommended process.
How to Make the New Drive Your Main Game Storage
Once the new storage drive works correctly, you can make it your primary location for new game installations.
For Steam, add the new drive as a Steam Library folder and set it as the preferred location for new installations.
Other game launchers offer similar settings, although the names and menus differ.
Before changing your default location, confirm that the new drive has enough free space.
A simple organization system can make future maintenance easier. You might create folders for Steam, Epic Games, Xbox games, recordings, and other large files.
Avoid filling the drive completely. Keeping some free space available can make storage management easier and gives Windows and applications room for temporary data when needed.
If the new drive is significantly faster than an existing hard drive, installing frequently played games on the SSD can also provide a more responsive experience.
However, do not expect an SSD upgrade to increase GPU performance or automatically increase frame rates. Storage primarily affects loading and file-access behavior.
The upgrade is most valuable when your existing storage is too small, too slow, or both.
Organizing your new drive from the beginning can prevent the same storage problem from returning a few months later.
How to Move Windows to a Larger SSD
Sometimes users want more than additional game storage. They may want to replace the original system drive with a larger SSD.
This process is more complicated because Windows, applications, boot files, and personal data may all exist on the original drive.
One option is cloning the existing system drive to the new SSD. Another is performing a fresh Windows installation and reinstalling applications.
Cloning can preserve the existing installation, but the process requires careful disk selection. Choosing the wrong source or destination can result in data loss.
Before cloning, create a backup of important files. Do not treat cloning as your only backup.
You should also verify that the new drive is compatible with the motherboard and that its capacity is large enough to contain the data you want to migrate.
After cloning, the computer may need to boot from the new drive. BIOS or UEFI boot settings may need adjustment.
A clean Windows installation can provide a fresh system, but it takes more time because you must reinstall programs, drivers, launchers, and games.
For users who only need more gaming space, adding a second drive is usually simpler than replacing the Windows drive.
If your goal is specifically to upgrade the boot drive, carefully research the cloning or clean-install process for your exact Windows and motherboard configuration.
Common Storage Upgrade Problems and Fixes
A new drive does not always appear immediately after installation. Several common problems can cause this.
If a SATA SSD is missing, check both the SATA data cable and SATA power cable. Try another SATA motherboard port if necessary.
If an M.2 drive is not detected, verify that the motherboard supports its interface. An M.2 slot may not support every type of M.2 SSD.
If Windows detects the drive but File Explorer does not show it, open Disk Management. The drive may simply need initialization, partitioning, formatting, or a drive letter.
If the drive appears with the wrong capacity, check whether the operating system is displaying usable formatted capacity rather than the manufacturer’s advertised decimal capacity.
If the computer stops booting after a storage change, check BIOS or UEFI boot settings. The system may be attempting to boot from the wrong drive.
If a new SSD causes unusual instability, shut down the PC and inspect the physical installation. Check that the drive is securely installed and that cables are properly connected.
Do not repeatedly force hardware into place. If something does not fit, stop and verify compatibility.
When troubleshooting, change one thing at a time. This makes it easier to identify the actual cause of a problem.
Storage Upgrade Mistakes to Avoid
Several simple mistakes can turn an easy storage upgrade into a frustrating experience.
The first mistake is buying a drive without checking compatibility. Always identify your motherboard and available storage connections first.
The second mistake is formatting the wrong disk. Disk Management can show multiple drives, so carefully verify the drive’s capacity and current contents before deleting partitions.
The third mistake is forgetting SATA power. A SATA SSD requires both a data connection and power connection.
The fourth mistake is assuming every M.2 slot supports NVMe. M.2 is a physical form factor, not a guarantee of a particular storage interface.
The fifth mistake is ignoring physical dimensions. A drive may be electrically compatible but still require an appropriate mounting location or hardware.
The sixth mistake is moving game folders manually without telling the launcher. This can cause games to appear uninstalled.
The seventh mistake is skipping backups. Before changing partitions or replacing a system drive, back up important files.
The eighth mistake is expecting more storage to dramatically increase FPS. Storage upgrades mainly affect capacity and loading behavior.
Finally, do not rush the installation. Disconnect power, handle components carefully, and verify each connection before turning the computer back on.
How Much Storage Should You Add?
The amount of storage you should add depends on how you use your Skytech Archangel 2026.
A smaller SSD can work if you only need space for several frequently played games. A larger drive makes more sense if you maintain a large library or regularly install modern AAA games.
Consider the size of your current game collection and how quickly it grows.
If you frequently record gameplay, store video files, or edit content, you may need substantially more space than a casual gamer.
You should also consider future updates. Games can become larger over time through downloadable content and patches.
Buying slightly more capacity than your immediate requirement can reduce the need for another upgrade soon.
For many users, separating Windows from a large game library can be a practical strategy. The original system drive can hold Windows and important applications, while a larger secondary SSD stores games.
If you regularly uninstall games to make room for new ones, that is a strong sign that your current storage capacity is too small.
Remember that advertised storage capacity and usable Windows capacity will differ slightly because manufacturers and operating systems calculate storage differently.
Choose based on your actual usage rather than simply buying the largest drive available.
Conclusion
Learning how to upgrade storage in gaming PC Skytech Archangel 2026 is easier when you first identify the exact hardware inside your system. Skytech sold the Archangel 2026 in different configurations, so the available storage connections and original drive setup can vary.
For many users, adding a compatible 2.5-inch SATA SSD or M.2 SSD is a practical way to gain more gaming space. Before buying, check your motherboard, available ports, drive compatibility, physical mounting options, and required cables.
After installation, use Windows Disk Management to initialize and format a new drive, then configure your preferred game launcher to use it. You can move supported games to the new drive and use it as the default location for future installations.
If you plan to replace your Windows drive instead of simply adding storage, make a complete backup and carefully research cloning or clean installation procedures.
With the right preparation, a storage upgrade can give your Skytech Archangel 2020 much more room for modern games, recordings, applications, and personal files.
FAQs About How to Upgrade Storage in Gaming PC Skytech Archangel 2026
Can I add another SSD to a Skytech Archangel 2026?
In many configurations, an additional SSD may be possible, but the exact upgrade depends on the motherboard’s available SATA ports, M.2 slots, power connections, and physical mounting space. Check your specific system before purchasing.
Does the Skytech Archangel 2026 support an M.2 SSD?
Some configurations may support M.2 storage, but you should identify the exact motherboard and check its specifications. Do not assume that every Archangel 2026 configuration has the same M.2 support.
Do I need to reinstall Windows after adding a storage drive?
No. If you are simply adding a secondary storage drive, you normally do not need to reinstall Windows. You can initialize and format the new drive in Windows and use it for games and files.
Will a bigger SSD increase gaming FPS?
Usually, no. A larger SSD primarily gives you additional storage capacity. Moving from a hard drive to an SSD can improve loading and responsiveness, but FPS is mainly influenced by components such as the GPU, CPU, and game settings.
Should I use an SSD or hard drive for gaming?
An SSD is generally the better choice for modern gaming when your budget allows it because it offers faster data access and typically improves game loading compared with a traditional mechanical hard drive. A hard drive can still be useful for inexpensive high-capacity storage.